


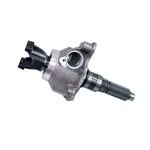

When converting your Toyota 4WD truck to a new engine, there are many items that you must consider. The information listed in this section covers Toyotas manufactured from 1979 to 1995 to help you put together a Toyota pickup engine swap kit and tackle this project. Most areas discussed in this section are categorized by the vehicle year, the stock engine the vehicle was originally equipped with or the stock transmission and transfer case. If you have specific questions about your engine swap, contact Advance Adapters at 800-350-2223.
Body Lifts
1979-85: Although a body lift is not required to complete a conversion on these vehicles, we recommend that you consider a minimum two-inch body lift to provide additional engine compartment and transmission tunnel area clearances. This will also provide additional clearance for the distributor cap.
1986-95: These vehicles were equipped with an independent front suspension (I.F.S.). For engines swaps on this year range, your vehicle must have a body lift. A minimum two-inch body lift will provide the necessary clearances for the transmission and engine to fit properly. Vehicles without a body lift will require extensive engine compartment modifications. Note: If a T.B.I. block from out of a truck is going to be used, a three-inch body lift will be required for hood clearance.
Suspension Lifts
1979-85: When performing an engine swap on your Toyota 4WD, we recommend you install a suspension lift. The suspension lift will be an asset to your vehicle when performing these conversions as it provides your vehicle with better ground clearance and wheel travel. The suspension lift will provide additional clearance between the front driveshaft and the starter motor assembly. Installing a V6 or V8 engine will also add additional weight to the front of your vehicle. For instance, your four-cylinder engine weighs about 300 pounds. New Toyota V8 motors weigh about 575 pounds and a new V6 is approximately 450 pounds. A suspension lift will normally provide additional support to handle these heavier engines. If a suspension lift is not used on these vehicles, a helper spring or stiffer leaf spring may be required.
1979-81: On these year vehicles, Toyota utilized a front stabilizer bar. This bar is attached to the front axle on the driver's side of the vehicle. When doing a V8 engine swap, the mount where this bar attaches will need to be relocated or removed.
1986-95: When performing an engine swap on your Toyota 4WD with the I.F.S. suspension, we recommend installing a suspension lift. When positioning a new engine into these vehicles, oil pan clearance is an issue. The easiest way to obtain the proper oil pan clearance is by installing a suspension lift. The suspension lift required for these year vehicles will drop the entire front axle away from the frame, providing the necessary clearances for all engine swaps.
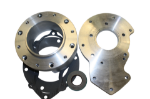
Motor Mounts
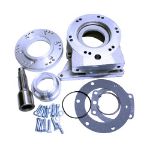
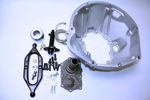
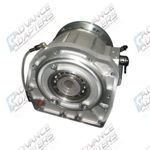
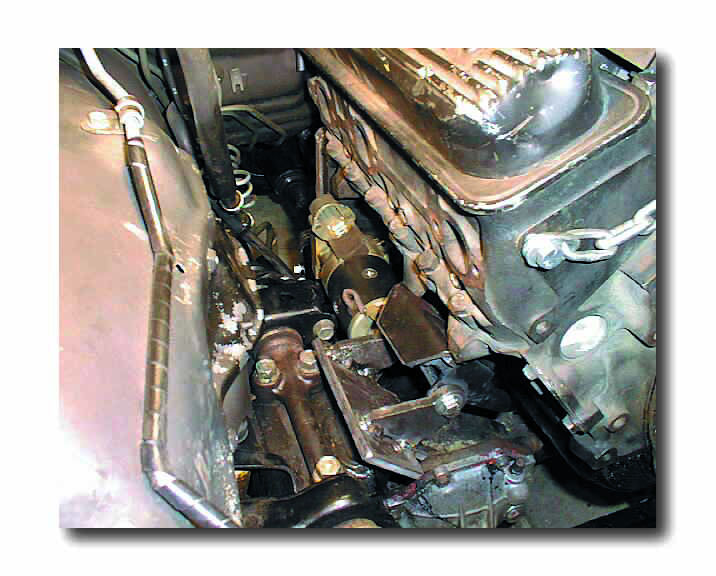
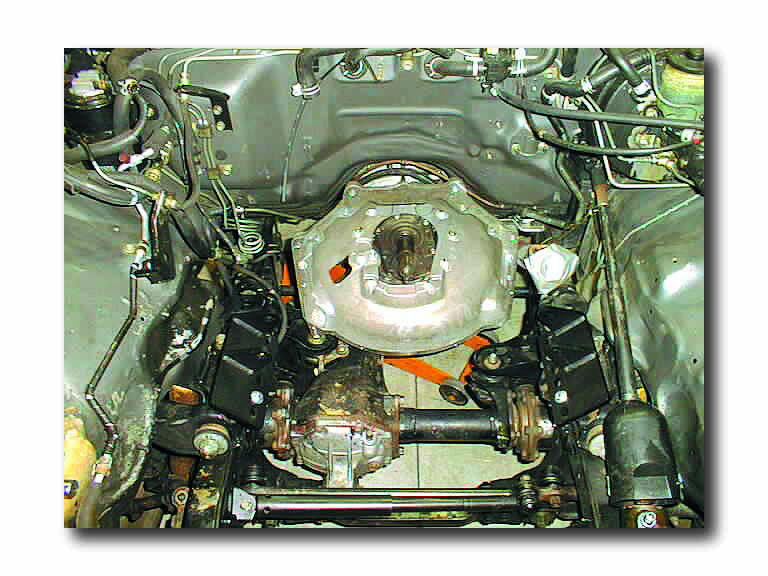
Toyota used a straight axle on 4WD trucks from 1979-85 and started using an I.F.S. suspension on 1986 and newer vehicles. We offer motor mounts for various engine blocks; the proper engine mounts will depend on your vehicle's front axle configuration. The mounts listed for each engine should be used with both the bellhousing and/or transfer case adapters.
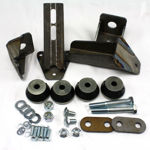
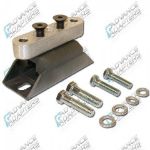
There are two styles of engine mounts available for your Toyota truck engine swap. The first is the weld-in style that is used on vehicles equipped with a solid front axle. These mounts are fully adjustable and can be welded or bolted to the inside of the frame rails. By having this adjustable option, you can position the engine so that driveline modifications can be eliminated on certain applications. The two mounts that extend outward from the engine block will usually need to be shortened to fit between the two frame rails. This may vary depending on the height of the engine.
The second style of engine mounts are the ones that bolt onto the existing four-cylinder or V6 engine pads. These mounts have been designed for an engine location that cannot be changed. This type of motor mount is mandatory on vehicles equipped with an independent front suspension. Motor mounts on these installations will normally allow you to correctly adjust the engine position up to the original five-speed transmission or the popular TH350 and 700R-4 transmission options.
Our weld-in mounts are a complete frame-to-block setup, which includes rubber insulators. Some of our bolt-in mounts will require the use of a stock GM engine rubber mount (GM# 3990914, Sealed Power/Federal Mogul #270-2267 or NAPA #602-1106).
Chevy V8:
- 713001-S - Chevy V8 mounts to Toyota 1979-85 (weld-in)
- 713013 - Chevy V8 mounts to Toyota 1986-95 replacing a four-cylinder engine
- 713125 - Chevy V8 mounts to Toyota 1988-95 replacing a V6 (bolt-in)

Chevy 4.3L V6:
- 713001-S Chevy 4.3L V6 mounts to Toyota 1979-85 (weld-in)
- 713013 - Chevy 4.3L V6 mounts to Toyota 1986-95 replacing a four-cylinder engine
- 713126 - Chevy 4.3L V6 mounts to Toyota 1988-95 replacing a V6 (bolt-in)
Buick V6:
- 713011 - Buick V6 mounts to Toyota 1979-85 (weld-in)
Ford V8:
- 713002-S Ford V8 mounts to Toyota 1979-85 (weld-in)
NOTE: These mount kits provide new GM rubber mounts and a crossmember relocation plate. Driveline modifications will be required.
Radiators
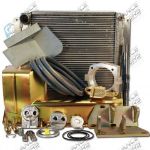
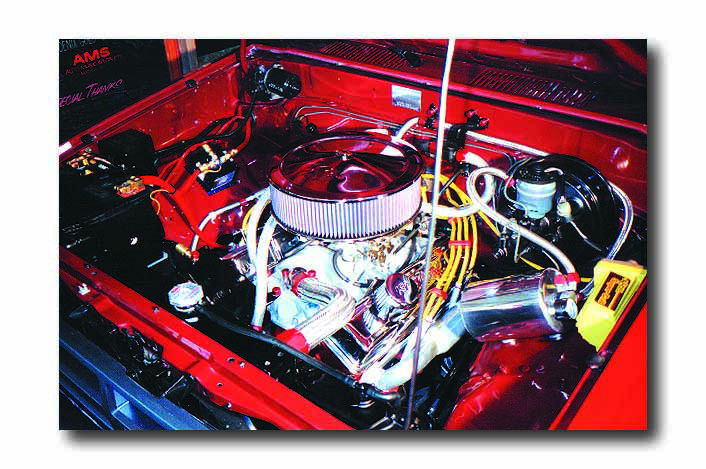
A new radiator is normally required when doing an engine swap. We offer a new radiator for Chevy 4.3L V6 and V8 engines. The Rad-A-Kool 2-core aluminum radiator has a down-flow core configuration with the proper inlet and outlet location for these blocks. It comes complete with a transmission cooler.
The Rad-A-Kool aluminum fits Toyota vehicles from 1979-95 and is rated to cool engines up to 300 horsepower. This radiator is ideal for engine conversions that are tight on space and is your best choice on 1986-95 Toyotas using our bolt-in engine mounts. Add them to your Toyota pickup motor swap kit for improved cooling and performance.
- 716698-AAV6 - Chevy V6 radiator for Toyota 1979-95 with automatic transmission
- 716698-ABV6 - Chevy V6 radiator for Toyota 1979-95 with manual transmission
Engine Fan
On most Toyota pickup motor swap projects, you can able to use a 16-inch conventional fan. However, conventional fans are limited in radiator clearance. To obtain additional clearance for the radiator, a short-style water pump could be used. Some of the newer blocks with the serpentine belt system will usually allow enough radiator clearance to retain a conventional fan. When using a conventional fan, make sure you have adequate clearance for your radiator and proper shrouding for airflow and personal protection.
![]()
When your engine position does not allow adequate clearance for a conventional fan, an electric fan is an ideal option. An electric fan can be mounted in front or behind the radiator to maximize space. Many electric fan manufacturers offer slim-designed fans to help in this regard.
We offer Spal fans which are high-performance, curved-blade fans in pusher or puller designs. These fans are 16.3 inches tall, 15.75 inches wide and 3.39 inches deep at the fan motor. The fans are rated at 2070 CFM; and being that they are pre-shrouded, they are ideal for cooling larger engines. Our fan kits come complete with a wiring harness which is compatible with positive and negative ground vehicles. The 3/8-inch pipe thread-sending unit is designed to turn the fan on at 185 degrees and off at 170 degrees. The kit comes with a 40-amp relay, a fuse holder, and all other necessary hardware. In addition, our kit includes mounting brackets for the fan to the radiator. The mounting brackets are designed for our aluminum radiators; however, we can supply you with brackets to fit our copper and brass radiators upon request.
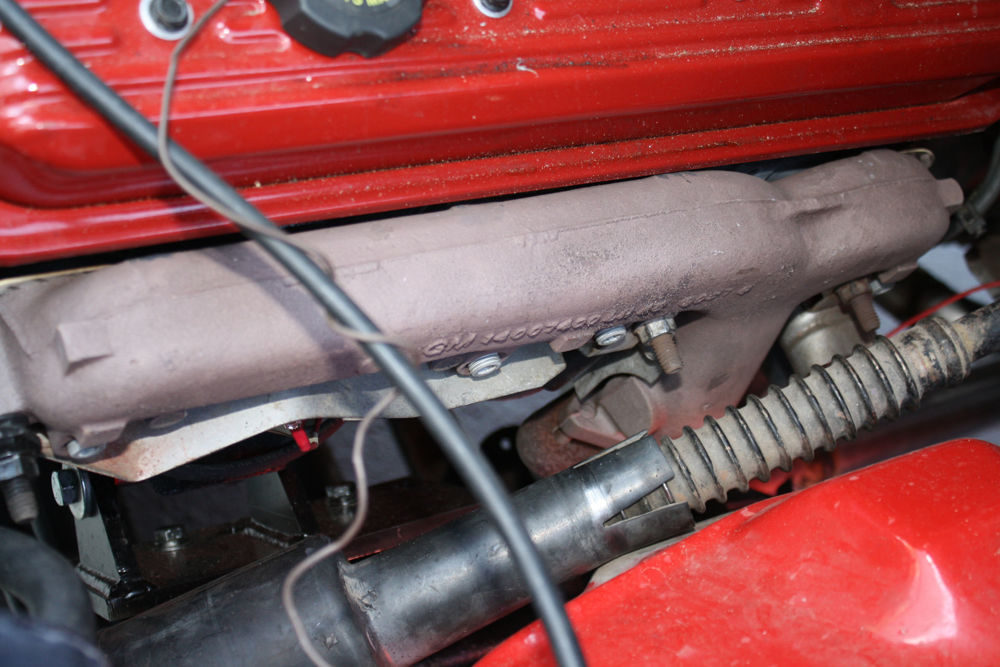
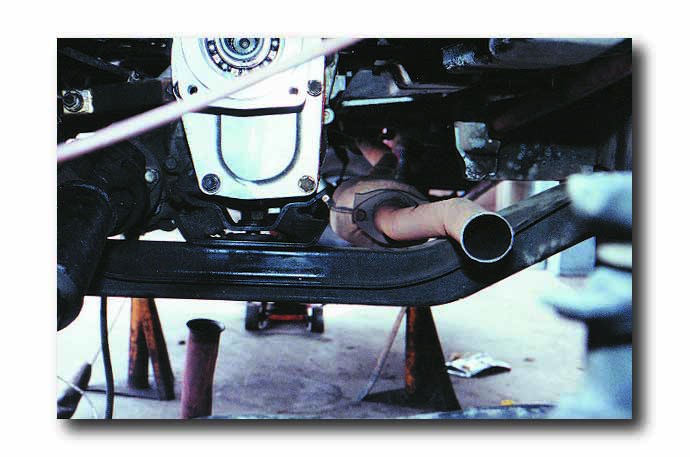
Oil Pans
On 1979-85 Toyota vehicles equipped with the solid front axle, you will be able to use the stock engine oil pan without modifications. On 1986 and newer vehicles with the I.F.S. front axles, you have two options. The first is to equip your vehicle with the recommended suspension lift, providing the necessary stock oil pan clearance. The second option would be to modify your stock pan. The entire bottom of the pan needs to be re-fabricated to fit, and some grinding may be required on the front differential housing. You will also notice there is limited clearance between the pan and the differential. Even though clearance is limited, this should not be a concern because the engine and front axle mounts have very little movement. We sold modified pans for several years but no longer offer this product.
![]()
NOTE: Newer GM blocks equipped with the aluminum oil pan should not be used on vehicles that do not have a suspension lift. Modified oil pans are not available for these engines, and starter clearance with the oil pan can also be an issue with these blocks.
Oil Filter
The original Chevy V6 or V8 oil filter can be retained. On some installations, we have had customers use a remote oil filter adapter to provide additional clearance for their exhaust system on the driver's side.
Since the oil filter connection on a Ford block protrudes towards the driver's side frame rail, a remote oil filter adapter is required. We offer a remote filter adapter that provides the oil line connections at a 90-degree angle, which provides the greatest amount of clearance for the Ford block.
- 716084 - Ford remote oil filter kit
Exhaust Headers and Stock Manifolds
On most conversions, you will have the option of using a custom exhaust header or stock manifold. If you are using headers, you need to verify your state's emission requirements since the headers we supply are not smog-legal. The following conversion headers are for V8 blocks. Our headers are designed around conversions using our motor mounts. Due to vehicle variations, some modifications may be required when using our exhaust header systems.
- 717011- Chevy V8 center dump headers (vehicles 1979-85 only) (Only sold in stainless steel, ceramic-coated and non-plated)
Smog-legal vehicles will normally require you to retain the stock manifolds. On GM V8 installations, the stock manifolds from a 1982 and newer low-performance car engine work the best. These manifolds can normally be installed without any modifications. For Chevy V6 installations, the manifolds from a 1985 Chevy full-size truck are an option. You can also try manifolds off a 1980 Monte Carlo equipped with a 3.8L V6. On Ford V8 conversions, the early Maverick manifolds work well; however, they do not have smog connections. We have been told that the exhaust manifolds from a V8 Ford Explorer will fit with only minor modifications required. On the Buick V6, manifolds #25507801 and #1250528 should be used.
NOTE: All the stock manifolds suggested above were obtained from customers who have completed the various conversions. We have not personally verified the fit of these manifolds for Toyota truck engine swap kits.

Fuel Pump
Fuel can be supplied to the new engine from a carbureted block in two ways: an electric fuel pump or a mechanical fuel pump. The mechanical pump is normally part of the engine and at times may create some clearance problems. When a mechanical pump cannot be used, the alternative is an electric pump.
Most carbureted blocks require a fuel pressure rating of five to seven PSI. Fuel-injected blocks require a higher fuel pressure. These blocks can use the stock fuel pump that your vehicle was equipped with provided it has the correct PSI rating to match your engine. If this is not an option, you can install an in-line fuel pump with the correct PSI rating to match your block. This pump should be added slightly ahead of the fuel tank. When using an aftermarket electric fuel pump, you should also incorporate a safety circuit to turn off the fuel pump if the engine stalls.
Whether your new engine is carbureted or fuel injected, and you use either a mechanical or aftermarket electric fuel pump, the stock fuel pump located in the fuel tank should not have to be removed.
Alternator
When replacing a four-cylinder or V6 engine, we recommend you purchase a new V8 alternator with an internal regulator to provide better charging to your electrical system. When wiring the new alternator, you must remove the original Toyota regulator and replace it with the following parts:
- GM Alternator Bracket GM #14081227 (Adjuster)
- GM Alternator Bracket GM #14015533 (Front Bracket)
- GM Alternator Bracket GM #6262934 (Spacer)
If you elect to use the GM alternator, which is equipped with a built-in regulator, you will need to change the wiring. Remove the existing Toyota regulator and cut the wires that feed the regulator. These wires will be the source of power to your new GM alternator. The large 10-gauge wire must be extended to the large post on the back side of the new alternator. You then need to determine which of the small wires is hot when the ignition switch is on. Next, the hot wire must be extended to reach the number one terminal on the GM alternator. You must then install a jumper wire between the 10-gauge terminal and the number two terminal. Use the original GM plugs to make sure the connections are properly fitted.
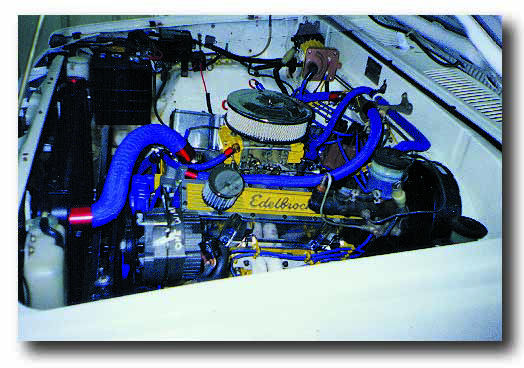
Pulley System
The belt system required to drive the alternator, water pump, power steering and air conditioning can all be accomplished with a two-belt system. If a three-belt design is attempted, you will find the length is too critical for radiator clearances. With the two-belt system, you will be able to drive the alternator, water pump and crank on one belt and the air conditioning, water pump and crank on the other. Make sure the air conditioning and alternator brackets are adjustable. The serpentine belt system found on newer motors also works excellently.
Water Pumps and Thermostats
Chevy engine installations have the option of a long or short water pump. The long-style water pump is most common on Chevy blocks. The stock bracketry on most V6 and V8 engines is designed to be used with a long-style water pump. A short water pump will give additional radiator clearance; however, accessory brackets are sometimes hard to come by. We offer the high-performance FlowKooler brand of high-flow mechanical water pumps and thermostats for Chevy V6 and V8 conversions.
Chevy and Ford blocks with a serpentine belt system can usually retain this stock belt system. They normally provide sufficient clearance for your radiator. Be careful if you replace the water pump on a serpentine system since it usually rotates in the opposite direction.
FlowKooler Pumps:
- 25-1668- GM short water pump (1955-91 Chevy). This water pump is 5-11/16 inches long.
- 25-1759- GM long water pump (1955-91 Chevy). This water pump is 6-15/16 inches long.
FlowKooler Thermostat:
- 25-1600- 160-degree hi-flow thermostat. It has all brass and copper construction with a balanced sleeve.
Power Steering
You can utilize your original stock power steering pump by fabricating a mounting bracket to fit your new block. The original hoses can usually be retained without modifications if the stock pump is retained with a custom-fabricated bracket. However, we recommend utilizing a stock power steering pump and bracket from the engine that you are installing.
For example: When installing a Chevy V8, you would use a standard GM power steering pump. The only modification needed would be to couple the GM pump to the Toyota box. This can be accomplished by having a custom power steering hose made in which one end is a Chevy fitting to fit the pump, and the opposite end is equipped with a fitting for the Toyota box. This installation would only require one custom hose, which is the pressure hose. The return line is simply a rubber hose and steel fittings coupled together with hose clamps. The same procedure will work for Chevy V6, Buick V6, and Ford V8 installations.
Air Conditioning
Toyota used three types of air conditioning compressors. Each type of compressor will require making a custom bracket for your new engine. We recommend that the compressor be located on the passenger side so that the original A/C lines can be retained without modifications. If you don't want to fabricate your brackets, a simpler way is to retain the air conditioning compressor on the new engine. The stock Toyota air conditioning lines can be spliced to the new engine A/C lines very easily. Check with your local automotive parts store for an A/C splice kit. This eliminates any requirement for custom compressor bracketry.
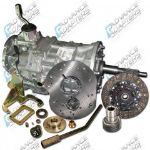
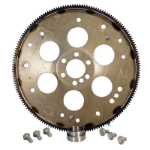
Flywheels and Starter Motors
The starter motor must match the flywheel that you have on your engine. For GM engines, you will be able to use a 153-tooth or 168-tooth flywheel/flex plate. On Buick engines for both automatic and manual applications, you will be limited to a 160-tooth flywheel/flex plate. On Ford blocks, you will be able to use a 157-tooth or 164-tooth flywheel/flex plate.
Depending on your application, it is critical that you properly match the starter and the flywheel. With Ford applications in particular, the bellhousing must also be matched. For GM applications using a 168-tooth flywheel, use starter #3510 or GM #1108400. For GM applications using a 153-tooth flywheel, use starter #3631 or GM #1108789. These starters can sometimes cause exhaust clearance problems. For a trouble-free swap, a gear reduction starter is ideal because of its size. For Buick applications, use Delco# 1968122. On Ford applications, the standard starter to match your bellhousing and flywheel will work fine.
Gauges
When converting to a V6 or V8 engine, you must use the stock sending units. These units will be compatible with your stock Toyota gauges. Since the oil pressure and engine temperature sensors have a metric thread, you will need to use a special bushing in your new manifold to adapt to these metric threads. These items are available from your local automotive parts. Stewart Warner fittings are normally the easiest to work with.
If your vehicle is equipped with a factory tachometer, you will have two options. You can buy an aftermarket tachometer or re-calibrate your stock tach. When swapping a Chevy or Buick V6 into vehicles that were originally equipped with a V6, no tachometer modifications will be required. On Chevy, Ford or Buick engine swaps, your tachometer will run anywhere from 50% and up off calibration. To re-calibrate your tachometer, a trip to your local electronic store will be necessary. By purchasing a 5K OHM trim potentiometer, you will be able to fine-tune your tachometer. The Toyota tachometers accept a pulse ignition signal from the coil and convert it to a proportional DC signal that drives the meter in the dash. By adding the potentiometer in line with the tachometer input wire, you will be able to calibrate it by restricting its impulse signals. A small 10-turn potentiometer is the easiest to use for this calibration procedure.
Ignition System
Once your conversion is complete, you need to rewire your ignition system. Below, we have listed the two types of ignition systems that you can use when installing a new engine.
Ignition: Your new engine can be equipped with a point-type or an HEI-type ignition. These will both fit your vehicle with only slight firewall modifications required on the HEI distributors. When using the HEI distributor, the hot wire from the ignition will plug directly into the distributor battery terminal. If you are attempting to install a fuel-injected or throttle body motor into your vehicle, we recommend you purchase a Toyota service manual to help you identify the existing wiring system for compatibility with the new engine.
What you need to do is locate the yellow wire that was originally attached to the positive side of your stock coil. This is the hot wire that will feed your new GM ignition system. If you are using a point-type distributor, you will need to install an external resistor that is compatible with your new coil and distributor. If you are using an HEI system, this same yellow wire will need to be attached to the electronic control unit which will then attach to the positive side of the ignition coil.
Charging System: The power source for your vehicle is referred to as the charging system. You must have this system wired correctly so your battery will properly recharge and you will be able to operate all your electronic accessories. Since you are replacing a four-cylinder engine and installing a V6 or V8 engine, you will need to install a new battery with the required cold cranking power needed for your new power plant. A typical V8 requires a rating of at least 550 amps. If you are using your stock alternator along with a new starter, your stock wires will simply attach to the new starter.
NOTE: When using a V8, you should use at least a 90-100 amp alternator. Your alternator will already be wired correctly. However, if you are installing a new GM alternator, you will need to locate the correct wires for supplying the power to the new alternator.
Wiring
When it comes to computer-controlled engine blocks, there are many aftermarket sources. Here are two sources that manufacture conversion wiring harnesses:
- Howell EFI - GM wiring harnesses - Phone: 810-765-5100
- Street & Performance - GM and Ford wiring harnesses - Phone: 479-394-5711
- Speed Scene Wiring - GM wiring harnesses - Phone: 210-370--7791
![]()
Frequently Asked Questions
How much horsepower does a 1990 Toyota pickup V6 have?
The 3VZ-E 3.0L V6 used in 1988-95 Toyota pickups was rated for 150 hp (4,800 RPM) and 180 lb.-ft. of torque (3,400 RPM). It was the standard engine option on the Toyota SR5 (Sport Runabout 5-Speed) and was an optional upgrade on the Toyota Xtracab Deluxe. Doing a 1990 Toyota Pickup SR5 3.0 engine swap can greatly boost these numbers. Several four-cylinder engines were also available on the 1990 Toyota pickup, including the 1.8L 2Y-U I4 (78 hp), 2.4L carbureted 22R (109 hp), 2.4L fuel-injected 22R-E (113 hp), 2.4L 2L-II diesel (89 hp) and 2.8L 3L diesel (90 hp).
What gen is a 1990 Toyota pickup?
The 1990 Toyota Pickup (known globally as the Toyota Hilux) is part of the fifth generation of Toyota trucks. This generation was produced from 1988-96 globally but was replaced in North America by the Tacoma for the 1995 model year. The fifth-gen Toyota Pickup could be purchased with a regular wheelbase (103 inches) or long wheelbase (122 inches) allowing for regular or extended cabs and long or short beds. In addition to the six engine options, there was the choice of a four-speed manual, five-speed manual or four-speed automatic transmission in 2WD or 4WD.
What are the most compatible engine options for swapping into a 1990 Toyota Pickup SR5 with a 3.0L engine?
One of the easiest conversion options is the 3.4L V6 from a Toyota Tacoma or 4Runner. As a bolt-in 3.0L engine replacement, installation is straightforward with few modifications needed. The Toyota 1UZ-FE V8, Chevy 4.3L V6 and Chevy V8 LS1 are popular choices if you want a bigger power and torque increase, but more mods are required to make the engine fit.
What modifications to the drivetrain, wiring and cooling system are required when swapping a different engine into the 1990 Toyota Pickup SR5?
You will need new motor mounts that fit the new engine along with new engine harness wiring. Body and suspension lifts are also necessary since a bigger engine needs more space to clear the oil pan. A new radiator is often required to provide the extra cooling for a higher-horsepower engine.
How does the performance, reliability and fuel economy of the 3.0L engine swap compare to the stock 22R or other popular engine options for this model?
Replacing the 22RE engine with a 3.0L or 3.4L Toyota engine will give you noticeably more horsepower and torque. However, the fuel efficiency won’t be as good. More maintenance may be necessary as well; Toyota V6 engines are more complex and known for periodically having head gasket issues and warped heads.


